How to Install LED Strip Lights on the Ceiling
We love LED strip lights here. We use them all the time because they’re versatile, come in a variety of different colors, and most importantly, they look beautiful!
In this article I’m going to walk you through step-by-step how to install your LED strip lights on the ceiling.
Step 1: Determine how many strip lights you’ll need
Skip ahead if you’ve already done this.
First things first, you’ll need to map out how many LED strip lights you’ll need to cover your room’s perimeter. Preferably you will use an LED strip long enough to cover the whole perimeter, but that might not always be an option, especially if you have a larger room (lucky you!).
Either way, this calls for the trusty tape measure!
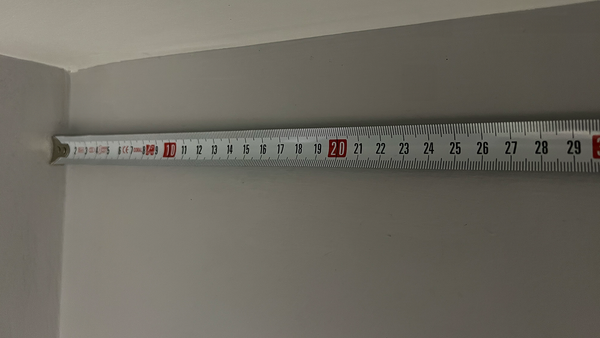
Measure the perimeter of the room, making a note of each ceiling measurement as you go. It’s okay not to have your tape measure right up against the ceiling (as you can see in the image above), so long as you keep the measuring tape level to the ceiling.
Once you’ve got all your measurements, find the LED strip light you want, check how long it is, and buy enough to cover the distance you’ve just measured.
Like I said earlier, there are LED strips out there that are 25ft+ (some are even 65ft+), so try and find a strip you only need one of. Otherwise, you may need to install multiple plug sockets around your room (if you’re using plug-in strip lights), or you’ll constantly need to be switching on/off individual LED strips each time you want your room lit up. Not ideal.
Note: Don’t worry if the LED strip you buy needs to be cut down to size – you can cut them at the designated cutting points, which we walk you through here. Once you have your LED strips the correct length, continue with this guide.
Step 2: Install batteries and check LED strip light is working
Test out your LED strip light before installing it on the wall. The last thing you want to do is install it, only to find out it’s faulty or some of the LED modules don’t work.
So, add the batteries into the battery pack, switch it on, and double-check everything works as it should.
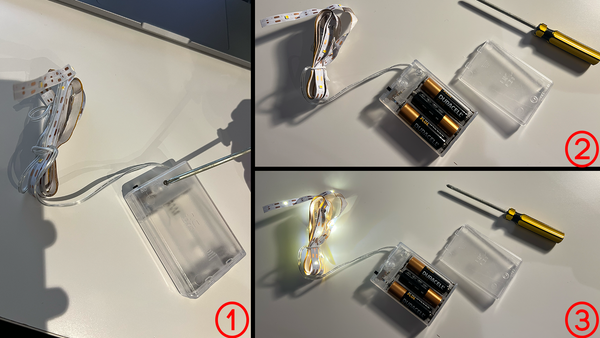
Note: You may need a screwdriver to open the battery pack (I did).
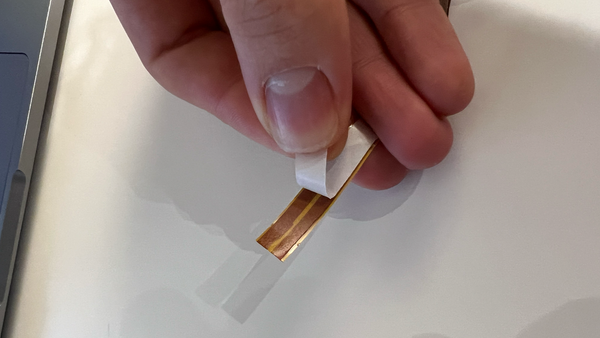
Step 3: Peel the protective backing off
Once you know everything is working, we’re ready to install the strips.
Before you do, I recommend removing all of the protective adhesive backing beforehand, otherwise you’ll be trying to apply pressure to exposed adhesive backing with one hand while trying to remove the protective coating with the other, all presumably while standing on a stepladder or chair.
At this stage I would also add some adhesive to the back of the battery pack, so that when you finish sticking the LED strip light to the ceiling you can stick the battery pack to the wall while you’re there. For this I would use Blu Tack, or a Command Strip.
Step 4: Stick LED strip to ceiling
Starting with the first corner of your ceiling, line your LED strip up with the top of the wall/bottom of the ceiling, applying pressure for 3-5 seconds as you do so. This will allow the adhesive on the back of the LED strip to sufficiently adhere to the surface of the wall.
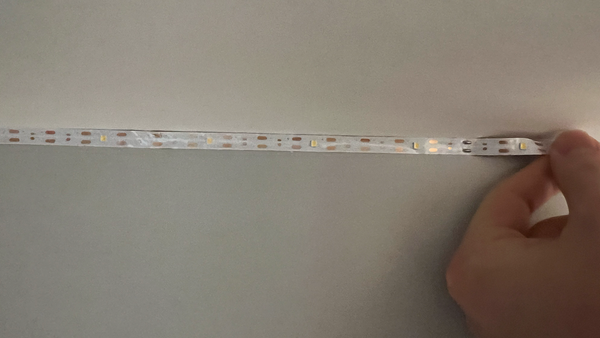
Don’t worry about standing there for 20-30 seconds for each section – once all of your LED strip is up, you can go back around applying pressure for a bit longer if you’re worried it’s going to peel off.
When you get to the battery pack at the end of your LED strip, you can simply adhere this to the wall wherever is most convenient.
Related Posts
How to Hide LED Strip Lights | A Guide for Your Next Project
How to Hang LED Strip Lights on Wall Without Adhesive | Tips and Tricks
Why Are My LED Strip Lights Not Sticking to the Wall?
As an Amazon Associate I earn from qualifying purchases.